Thursday, September 11, 2008

Report on first test of ArtRage

I purchased the Artrage program from Ambient. There's a free download, but it's missing some stuff--but still does a lot--there's a $25 download. I got the $39 version that comes with a CD and an 80-page manual.

I had terrible insomnia last night, which gave me an opportunity to play with my new toy. I had thought it was a plug-in for photoshop (and I sort of wish it were! then you could use it in combination with other photoshop effects etc)--I thought that's what I'd read, but I'd misremembered, I guess (I read a review in the Photoshop users Journal). It is not, or, if you can do that, I haven't figured out how. It's its own fully functional program.

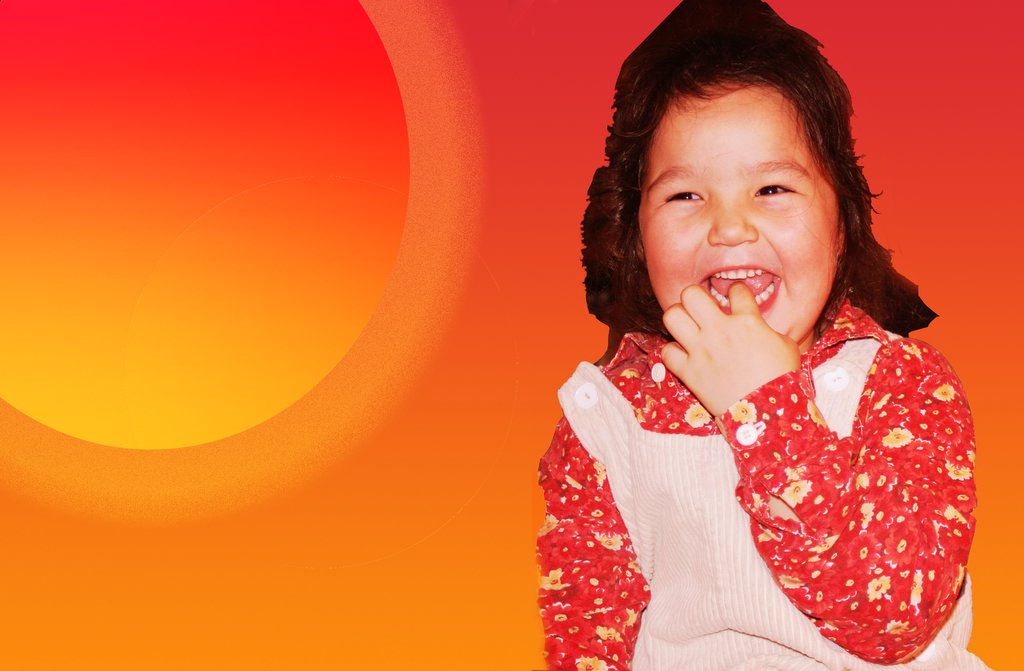
My first attempt, the red hibiscus, did not turn out all that well. Either did my second, the rose (recognize that rose?) I think the third is a little better--I did that this morning. The last picture
is the original of the fruit bowl still life.

You can load a picture, and then load another layer (yes, there are layers), and put a tracing version of it and paint into that layer and it makes it look like a painting. The oil paint is very realistic, as are the markers and pencils. More realistic (or closer to real paints and markers etc) than the photshop tools.

However, there are no shortcuts,a t least none I have discovered. Every paint stroke you have to make yourself. It took me a while just to begin to get the hang of it. You can change brush size and paint type and the way the paint responds. I just discovered that there is a slider for something I didn't realize had a slider. But so far, I haven't figured out any way to change the brush size other than typing in a percentage number, kind of a pain. But there is so much, that it
will take a while to figure out.

The palettes are in the corner and move out of the way when yr painting. Which is nice.

So far, I have to say, this program is not for the faint of heart. And my results are not that great for a lot of effort. But there are always learning curves. I will report back as I experiment.

You may have seen the red hibiscus before--I did a smudge painting of it on photoshop which came out MUCH better. However, when I did that last night, I hadn't yet learned how to change bush sizes or proper layering of the images I was attempting to paint.

You can also paint from scratch. I did one of those too, but deleted it. But I could see possibilities in it! These three are from photos.

I am not sure if there is any way to import the images into photoshop--that would be ideal What I did is save them as jpgs and then open those in PS. But the smudge brush in PS does NOT combine well with the AR brushes.

I recommend if you're interested you try the FREE DOWNLOAD first, see what you think. I recommend that if you decide to try it, get the image PERFECT in photshop first (as close as possible as to how you want the painting to look). Then load the image in the bottom layer, add a new layer, put the tracing image (same image) in the second layer and be sure the palette is set to paint from image colors. You can add other colors later. Just be aware the process is fairly time consuming, so don't start until you have a little free time.

Click on the images to view larger. Note the two black spots in the bottom corners of the still life with fruit. That's where I attempted to click on the palettes and missed. There is an undo function under edit in the drop-down menu.

Thursday, January 31, 2008

New Challenge: A hint of red

The challenge for the month of January for Seeing 101 is: a hint of red, or a taste of red. While I want to leave it mainly to your imagination, the idea of this challenge is to find or insert red in something mostly not red. And to gain in the process. You can submit any time in the month of January, or beyond that, using the subject line: "Hint of Red" or "Taste of Red". Art and photos are both accepted, as well as photoart.

Saturday, January 26, 2008

Spot the Red

A VERY SMALL HINT OF RED
Reflections on a fishing pond.

A Touch of Red: Footbridge Over Nashua Creek, Belle Isle

A Touch of Red: Footbridge Over Nashua Creek, Belle Isle, by Mary Stebbins Taitt. This was also an exercise in Selective Color and I am not sure it turned out as well as I'd hoped. The original picture was fairly colorless anyway, taken as it was during the winter. Click image to view larger.

A Hint of Red, Orchid

A Hint of Red, Orchid, by Keith Taitt

A Hint of Red: Sea Gull

A Hint of Red: Sea Gull, by Mary Stebbins Taitt

A Touch of Red: October Wind SP

A Touch of Red: October Wind SP, by Mary Stebbins Taitt. A digitally
altered photograph.

Sunday, August 13, 2006

Fonts


Here is a great site for fonts if you are interested.
 
 
Robin

Sunday, July 16, 2006

July 15 Theme/Challenge: Simplicity and Complexity

This challenge is for both photographers and artists. The idea is to explore simplicty and complexity. When is simple good and when is it too dull or boring? When is complexity good, and when is it too "busy" or "fussy"?

Post your pictures to July 15 (for intakes). Outtakes can be posted on the 14th or 16th. Use the post and comment options on the lower left of the posting window to adjust the date. You can post on the designated date or before OR anytime afterwards, as long as you change the date so that it fits in the time span of this theme/challenge.

Email me at taittems@gmail.com if you need an invitation to join the blog.

You may say anything reasonable about your own or other's photos, and, please, at some point in your comments, address the issue of simplicity and complexity in photos and/or art.

Saturday, July 15, 2006

Hung in the Balance, Collateral Damage VN

Hung in the Balance, Collateral Damage VN, by Mary Stebbins, Tait.

If prayers help and poetry helps and art helps and even war supposedly helps, then why do we till have war?

And why innocent people?

This is a submission for complexity, and before judging it too hastily for busy-ness, please consider that it is 42 X 35 inches in its full size.

I realize it IS busy, but all the elements in it seemed important to its message. SO what I want to know, is, IS it too busy for it's full size? Is it too busy for its online size?

I'm upset by the killing of so many innocent people. And I feel helpless. I don't know if art helps in any way. I hope it does. Posted by Picasa

Liquid Simplicity by Joe Terni

100% water with added salt. How simple is that?

Joe's Great Simplicty Shot!!!

Moonlight Simplicity


I like the way this is split down the middle with the line of trees to separate the crop from the sky. I like the simple sky which shows up the moon to full advantage. Without the line of trees and the moon I think this would be very stark and uninteresting.

Friday, July 14, 2006

Nautical Complexity - Outtake


I find it much harder to take a decent complexity shot. But after looking for triangles for Photique I liked the repetition of triangles not only in the sails but the boom and hull in the forgeround make a triangle and a sort of triangle in the middle with the slipway to the lifeboat station.

Pastoral Simplicity - Outtake


The reason I took this was because of the sky. But for simplicity's sake I tried it with a plain sky. It was so bad I will not even bother to show you.

Nautical Simplicity - Outtake


I think the simplicity of this image would be improved without all the detail of the buildings on the shore.
Possibly I should clone or layer in something more simple.

Saturday, July 01, 2006

Mr. Key Challenge Photos

Please post your Mr. Key Photos to July 1, 2006 no matter when you took them. Then, they will all be together. Add notes. The date change dialogue is on the bottom left in the tan bar of the posting box under post and comment options. Thank you! :-)

A Journal History of Mr Key by Marsha Smith

Mary, Your Mr. Key blog is very interesting and easy for folks to see everything. I just wanted to let you know exactly how this came about. Somehow it has gotten lost in the shuffle that this started with me and that when it is all over I want Mr. Key back. You are welcome to use both of my Mr. Key shots and the history of how his journey started if you like.

KK Parker posted a photo of a whole bunch of keys. All hotel keys but one. She asked which was different and I just happened to be the first person who saw the odd key.
She congratulated me and told me I had won the key of my choice from the photo. I chose the key with the S since my last name is Smith. I was really surprised when she actually sent it to me. I then made up a "postcard" from 'Mr. Key' to KK saying he was enjoying Texas. This is the link for that shot.

When she saw this, Terry Ellis said how cool if he could visit everywhere. So I sent him to her in California. She posted her shot and then sent him to Bobbie Davis. Bobbie was really busy at the time and didn't post for a long time. I got worried and posted this shot.

Then Bobbie posted her shot and sent him on to you. So at this point that is all the images there are. I am really pleased with everything and hope the momentum keeps up. Kate Jackson is a great place for him to go next and she says she is sending him to 'the flaming pair' in Georgia. I am keeping a journal of his travels and would also like permission from all who host him to use the images in the journal. When he has made the whole trip and gone as far as he can I would like to send the journal and Mr. Key back to KK Parker.

Marsha Smith

Mr. Key Visits Texas by Marsha Smith.


Mr. Key Visits Texas by Marsha Smith. Click image to view larger. Visit Marsha's BP Gallery. Posted by Picasa

MISSING, Mr. Key Missing Poster by Marsha Smith


MISSING, Mr. Key Missing Poster by Marsha Smith. Click on Image to view larger. Visit Marsha's Gallery.

Mr. Key Visits South Dakota, by Bobbie Davis

Mr. Key Visits South Dakota, by Bobbie Davis. Click Image to Vew Larger. Bobbie Davis' Gallery at BetterPhoto.com.Posted by Picasa

Mr Key Visits Sunny Southern California, by Terry Ellis

Mr. Key Visits Sunny Southern California, by Terry Ellis. Visit Terry's BP Gallery. Posted by Picasa

"Sit Down!!!" (Mr. Key visits Greenfield Village"

"Sit Down!!!" (Mr. Key visits Greenfield Village," Photo by Mary Stebbins.


"SIT DOWN!" (Mr. Key at Greenfield Village) After Leaving Terry Ellis and Bobbie Davis, Mr. Key has been doing a LOT of travelling. He's been halfway around the country three times and is now on his way to see Kate Jackson in Messing England.

One of the many places Mr. Key visited was the famous Greenfield Historical Village created by Henry Ford in Deerborn, Michigan. He was excited to ride with the historical girls, but they had to yell at him to sit down!

Stay tuned for more of Mr. Key's adventures!!! (He wonders if he'll run into Wandering Juanita somewhere.) Posted by Picasa

Memorial to Mr Key


The villagers in Messing were so delighted that the celebrated Mr Key came to visit that they decided to erect a memorial in his honour just outside the church and overlooking the playground. He is now more famous here than George W Bush whose ancestors originated from Messing.

Mr Key lends a hand


in raising the St George's flag on Ascension Day from the tower of Messing Church. He stayed for a while to enjoy the view.

Mr Key Lends a Hand No 2


The lads on Thrust were out in front in the Laser SP3 Series National Race off of West Mersea, Essex when their spinnaker pole broke. But Mr Key was on hand to effect a quick repair with the aid of a piece of string. At the prizegiving he was awarded a special trophy when the crew still managed to pass the finish line in first position!!

Mr. Key Hits the Rails

Mr. Key Hits the Rails, by Mary Stebbins. Click image to view larger.

By now everyone has heard of Mr. Key's sad disappearance. I don't know if you remember that I said I had more pix of Mr. Key in both Detroit and NY, so I thought I'd share this with you. Mr. Key was always SO ENTHUSIASTIC when he visited us. This is from our trip to Greenfield village and he is riding Thomas Train pretending to be a hobo--having the time of his life. Perhaps he isn't "gone" but has only hit the rails. If I ever have time, I may have to do a Mr. Key retrospective. Posted by Picasa

Thursday, June 01, 2006

Wandering Juanita and Wanda Pix

Please post your Wandering Juanita and Wanda pix on June 1, 2006, no matter when they were taken. That way, they will all be together. The date-change dialogue is on the bottom left in the tan posting bar under post and comment options.

Wandering Juanita promotes Fair Trade

When Wandering Juanita visited Kate Jackson in Messing, March 2006, she used her valuable time by promoting Fair Trade crafts from around the world. Here she is surrounded by crafts fromPeru, Africa and New Zealand

Wandering Juanita hitches a ride

Wandering Juanita came to visit us in Messing, England. Here she is on a duck in the pub window at The Prince of Wales, pub in Inworth.

Ellie and Orphi Go to Mardi Gras

Ellie and Orphi Go to Mardi Gras, by Mary Stebbins.

For those avidly following the travels of Wandering Juanita, she has traveled 400 miles east from Detroit to Syracuse on her way to England to visit Kate Jackson, a BP member eager to receive her. She has been joined by her old Grandmother, Wandering Wanda, and in the case, their clones, LOL! They will be departing for England very shortly! Bon Voyage, Juanita and Wanda. Hope you make it around the world!

Who's who here:

Ellie is the girl doll, Orphie is the tall cat, Juanita is the pink necklace that appears twice and Wanda is the red necklace that appears twice. Posted by Picasa

Monday, May 22, 2006

A Journal History of Mr Key by Marsha Smith

Mary, Your Mr. Key blog is very interesting and easy for folks to see everything. I just wanted to let you know exactly how this came about. Somehow it has gotten lost in the shuffle that this started with me and that when it is all over I want Mr. Key back. You are welcome to use both of my Mr. Key shots and the history of how his journey started if you like.

KK Parker posted a photo of a whole bunch of keys. All hotel keys but one. She asked which was different and I just happened to be the first person who saw the odd key.
She congratulated me and told me I had won the key of my choice from the photo. I chose the key with the S since my last name is Smith. I was really surprised when she actually sent it to me. I then made up a "postcard" from 'Mr. Key' to KK saying he was enjoying Texas. This is the link for that shot.

When she saw this, Terry Ellis said how cool if he could visit everywhere. So I sent him to her in California. She posted her shot and then sent him to Bobbie Davis. Bobbie was really busy at the time and didn't post for a long time. I got worried and posted this shot.

Then Bobbie posted her shot and sent him on to you. So at this point that is all the images there are. I am really pleased with everything and hope the momentum keeps up. Kate Jackson is a great place for him to go next and she says she is sending him to 'the flaming pair' in Georgia. I am keeping a journal of his travels and would also like permission from all who host him to use the images in the journal. When he has made the whole trip and gone as far as he can I would like to send the journal and Mr. Key back to KK Parker.

Marsha Smith

--
I am certain of nothing but the Heart's affections and the truth of the Imagination- John Keats
Mary

Monday, May 15, 2006

May 15 Theme: Beatle Song Titles

May 15 Theme: Beatles Song Titles.

here is a link to song titles and lyrics.

http://www.stevesbeatles.com/songs/

Good Day Sunshine

Good Day Sunshine, by Mary Stebbins. Click image to view larger.

"I like to laugh,
and when the sun is out,
I've got something to laugh about!" Posted by Picasa

Wait a Minute

Mrs Postman look and see, is there a letter in your bag for me.
I've been waiting a long, long time, since I heard from that gal of mine
O yea, wait a minute, wait a minute,
Mrs Postman, wait a minute, wait a minute
Oh please, please Mrs Postman

Tuesday, April 25, 2006

High Key Photo Defined


High-key Photo
Photo whose most important details appear in the highlights.
High key subjects concentrate on the lighter tones, using subject matter that is white or pale tones, and using flat overall lighting to avoid shadows.

Carla M

(Thank you Carla!)


high key photos are usually light bright and either high contrast bw or featuring bright color....here are some wonderful examples...
It is a technique often used in product or food shots, eye appealing and dramatic!

Candice (Thank you, Candice) Check out the link, it's helpful (Mary)

Candice has offered this picture at my request to illustrate the post. Thank you Candice. (Mary)

Monday, April 17, 2006

Shooting Gallery - Motion and May Themes

Hi guys, you did a wonderful job today with the motion pictures. Lots of variety and creativity. I think we'll see some as Finalists. Let's give Sheesh a round of applause for picking this month's theme, as it allowed us to go out and do things we don't normally do. That's one of the the things I like about our group.
Here's a recap of what we did. Hopefully everyone has visited each person's gallery. By Cathy's count, the score was 10 to 3 girls. Hmmm
Robin rain drops
Linda skateboarder
Nina tennnis player
Kate horse race
Mary flying bird
Ken strumming guitar
Cathy backside of waterfall
Darryl water wake behind boat
Candice bird landing (or taking off) from water
Tammy swamp
Sheesh escalator
Carla piano man
Dennis child on slide
Dennis Flanagan has picked May's theme, and it's a great one. The title must come from a Beatles' song. And you must include a couple of lyrics that go with the picture. Here's an example--just use your imagination. The title is "Help." Envision a picture of the 10 Shooting Gallery ladies, as a group photo. The lyrics say "Help, I need somebody, Help, not just anybody, Help, you know I need someone, Help."
Here's a great link you can go to for Beatle song titles and lyrics:
Ok, before anyone has a retort like "Loser" and "Nowhere Man" and my picture, it's too late. It won't be funny.
The May Theme post date is on Monday, May 15th.
v/r
Ken Smith
aka Captain

April 17 Theme: Blurred Motion

April's theme is MOTION....blurred motion. Not freezing motion. There is a million ways to do this if one gets creative. Some of our group have done this many times before, like for example waterfalls (long exposure) and I would say if they have done that they might want to think out of the box and do something different.(expand their portfolio). But if someone has never done that, it's a great thing to learn how to do. But it can be sports, birds, still life, there is a myriad of things that could be done. I wanted to choose something that gives the freedom to not have to go outside if they so chose to, since our last one was outside. Btw Panning is of course included in case anyone wants to do that for motion.

Sheesh adds:

Sorry I forgot to mention that it has to be in camera motion...in other words no PS motion added. :)
(that is for you guys!)
I know your tricks!


Sheesh adds:

Ken asked me to come up with some images as example for us to have some visuals of what I am talking about with blurred motion so here ya go.

Here is a place you can go to view some blurred motion shots... you can see how it is unending the ideas and things you can come up with. I didn't go to BP cause (I am sure they have them) but I would like us to think outside of the box of BP. (it is possible )

One thing you usually look for in a motion shot but not all motion shots is something blurred and something sharp... That conotates motion...and stillness.

So here is a link ....there are MANY MANY Photos for you to look through. This is a stock site. :)

Happy Hunting! ;)

Sheesh

and

In case you don't have time to go through a lot of images ... I am writing
down some that are in here and some I have thrown in as well.

tossing spagetti- creative idea! (that was in this stock site)
boxes falling on a man- I know Dennis want to set this up using Ken as the
model
golfer ball in motion
Runner, skaters, walkers, bikers in motion
Planes, trains and automobiles
car motion at night... like skyline (still) lights of the cars blurred in
motion
Flowers blurred by wind and slow shutter or by camera panning
Flag blowing in wind
musician in motion
machinery in motion
stars in the sky at night use tripod...long exposure they become lines in
the sky
Blurred trees in motion with someone standing still- this is an idea I threw
in that I want to do someday
Birds in flight or any animal for that matter- horses are great
kid swining
Dad throwing kid in air
fingers playing the piano
Chef chopping veggies fast- I did this in a asian restaurant once
Ferris wheel
dancing
people on escalator
Nina using a food processor ;)
Mary chasing her fiance Keith around the block to model for her again
Cathy chasing that elusive shot in the woods ....
Darryl chasing his tail... ;) jk
The list is endless and this just scratches the surface...as I am sure you
guys have plenty of ideas on your own. But if not hope this helps.

Blessings,
Sheesh

Saturday, April 08, 2006

Working with Layers

Many of you already know all this, but I've had a number of questions about layers in the past few days, so I thought I'd make a few remaarks about it. 

Layers are really extremely simple (once you get the hang of it).  Well, they can be complicated, but they can also be pretty easy.

The first thing I do when I set off to work on a picture is make a duplicate copy to work on (in case I mess up!) and the very next thing I do is to make a duplicate LAYER to work on.  Then all the original unchanged info is available in case I need it right in the same picture (readily available for access).  This also immediately protects the picture from data loss. 

I use adjustment layers to change brightness and contrast, levels, hue and saturation, warming etc.  You may already know this, but those things work just the same, but they don't bruise any pixels and if you don't like them, they can be easily removed or readjusted at any time without affecting later work (you don't have to back up and do things over).  You can clone from one layer to another, add things and subtract them again, etc.  After you play with it, it becomes very intuitive and not much different than not working with layers except that it is so much more versatile.

If you need any help let me know.  The easiest thing of course is to have someone show you.


--
I am certain of nothing but the Heart's affections and the truth of the Imagination- John Keats
Mary

Thursday, March 30, 2006

SG - Graduated Neutral Density Filters - Sunrise and Sunset Pictures

Subject: SG - Graduated Neutral Density Filters - Sunrise and Sunset Pictures

For our last theme, I bet most of you noticed you could get good colors in the sunrise/sunset, but the rest of the picture was too dark. Or, the foreground was in good exposure, but the sky washed out. What to do?

Try a graduated neutral density filter. Many of the great BP sunrise/sunset pictures make use of the graduated density filter. Here are a couple:

http://www.betterphoto.com/gallery/dynoGallDetail.asp?photoID=1905684

http://www.betterphoto.com/gallery/dynoGallDetail.asp?photoID=1811236

http://www.betterphoto.com/gallery/dynoGallDetail.asp?photoID=1695404

In all three pictures, you can see how the foreground has detail, versus being washed out. That’s the advantage of the graduated neutral density filter. Please note this is different than a regular neutral density filter.

Derrald Farnsworth, from Omaha NE (never met him), took the first two pictures. I asked him about his graduated neutral density filters. Here’s what he said.

Ken, I use Singh-Ray filters for my neutral density filters. I currently have a 2-stop soft grad filter and a 3-stop hard grad filter, however, I am waiting on a 3-stop soft grad. They currently fit in a Cokin holder that I have. The benefit of using a square filter is that you can set your horizon to any location in your photograph. You are not confined to where it is in the screw-on filter. Also, there are many times that I turn the filter slightly to hold back more light if the sun is to the right or the left of the composition. I strongly recommend Singh-Ray filters as they have less of a color cast then the Cokin filters, however, they are more expensive. If you want to do more sunset or sunrise photos I strongly suggest paying the extra and I suggest starting with the two I mentioned. You can go from there. You will defiantly get hooked on using them. You can get them at http://www.singh-ray.com.

I highly recommend getting the 2-stop soft and 3-stop hard filters. With that being said, I know that we all have budgets and they are not the cheapest filters. I would probably start with the 2-stop grad soft step one. I have found that I used that one the most and it was the one that I really started with. It is also the most forgiving. What I mean by that is if you do not use the 3-stop hard stop grad filter carefully, the line where you placed the filter will be evident in your photographs. The soft-step line in the photographs is much harder to discern, if you can at all. For my last three uploads to Betterphoto, I used the 2-stop soft grad filter with. It worked perfectly in those situations.

In my opinion, the order in which you should purchase the grad filters:

  1. 2-stop soft
  2. 3-stop hard
  3. 3-stop soft
  4. 2-stop ND filter (full ND, no grad)
  5. 3-stop ND filter (full ND, no grad)
  6. 1-stop soft
  7. 4 or 5 stop hard
  8. 1-stop hard

Of course, if you were to buy all 8, you are looking at $800. I only have the first three and it has taken me 3 years to accumulate those. I try to buy one a year."

Ken’s words…I just purchased the 2-stop soft filter. Previously, I had the screw-on filter. It cost $99. I will experiment later. Have a good evening.

Ken

Wednesday, March 29, 2006

Article on Cleaning your sensor by Brenda Tharp!

Keeping your Digital Sensor Clean

Dust is the Digital Photographer's enemy, I'm convinced. Simply changing lenses isn't as safe as it used to be with film cameras. But here's a few tips to help you minimize the dust-bunny buildup in your camera.

1. Always turn off the camera before changing lenses. When your camera is on, the charge across the sensor will draw dust like a magnet. If possible, wait a few seconds for the charge to dissipate. This is tough, when you are shooting fast action or moments, but when possible, it's a great habit to get into.

2. Turn your camera downward when changing lenses to minimize things falling into the camera's cavity.

3. Keep the back element and the mount of your lenses as clean as possible to keep from transferring more dust to the camera body.

When does it become necessary to clean the sensor? Do this test. Point your camera up at a blue sky, set it for infinity focus, and shoot at f16. Download that image into the computer, open it in Photoshop or Elements, enlarge it to 100 percent, and you will see the amount of dust and stuff you have on your sensor.

Everyone has their limits. For me, I'd rather not spend time spotting out the dust in the solid areas of my pictures on the computer. To keep that to a minimum, I've used a hurricane bulb blower on a regular basis - every day and sometimes more frequently when I was in dusty conditions. The blower really did an OK job for the light dust, but it wouldn't get it all and I was always worried I'd hit the sensor with the tip of the blower.

That's when Visible Dust's Sensor Brush came to the rescue. The original Sensor Brush is designed to be used with canned air. You spray the brush with the canned air and it charges the ions so when you carefully brush it across the sensor, it picks up the dust, rather than just moving it around. It's fantastic!

However, since many photographers travel, canned air is not easy to get at the destination. So Visible Dust developed the Sensor Brush SD, a brush that gets its charge from spinning. It runs off AAA batteries and is a full size brush. If you want to travel even lighter, their newest product, the Arctic Butterfly, also runs off batteries and is a smaller version of the Sensor Brush SD. The Arctic Butterfly is designed for light dust. But for me, heading to Egypt in January, I'm sticking with the SD version to be sure I'll get all the dust out.

Out, Out, Darn Spots!

When a little dust is not the issue, but you have spots to remove, Visible Dust again comes to the rescue. Using their Sensor Clean liquid with swabs, you can get rid of those stubborn spots. This has been a scary thing for many people, but it's really not difficult and worth the timesaving and moneysaving aspects of shipping the camera in for service.

So if you are dealing with dust on the sensor that is visible and annoying, use the tips above to help minimize it, and consider Visible Dust's products to eliminate the rest of it. There are other products on the market, but most of my professional colleagues and I are happy with Visible Dust's product line. For more information visit http://www.visibledust.com.

Posted by Brenda Tharp at November 29, 2005 12:47 AM

Comments

Great information Brenda....thanks

Posted by: Donna Cuic at November 29, 2005 07:52 AM

You're welcome, Donna - thanks for taking the time to read the blog!

Posted by: Brenda Tharp at November 30, 2005 09:35 AM

I too had problems with digital dust bunnies. I read MANY on-line articles on the problem and here was my solution.
I bought 91% pure isopropyl alcohol, sterile bandages, and a thin narrow kitchen spatula. After cutting the spatula to the correct width I wrapped a bandage around it and secured it with tape. I then applied a few drops of alcohol and swiped the sensor. It took me three tries to get all of that grime off.

Posted by: Danette at February 23, 2006 02:10 PM

Moo Trying to Fly, but not getting off the ground


Sorry, I couldn't resist posting this image! LOL!

Kate, since you're an administrator, you can delete it, but it's too fun!!! LOL!

Click on image to see larger.

Monday, March 27, 2006

Shooting Gallery - Ken's Take on Today's E-mails

Here's my tid bits based on today's topics.
1. Blog. I like the idea. Thanks Mary for running with this. There was confusion early on, but that's behind us. And Mary, thanks for understanding. I still want to post our monthly pictures to BP site, just like before. I'm not sold on asking folks to also post to Blog. Sorry Sheesh.
2. Linda Lester and 2nd Place. Outstanding!
3. Publically calling ourselves Shooting Gallery. I don't mind if you refer to us as Shooting Gallery or SG, or "Monthly Theme." I realize other BPers will pick up on our comments/posts and realize some of us are in a club. If they ask about the SG, just tell them that Ken Smith is running it. You don't have to tell them it's closed. When they contact me, I'll tell them. We've gone from 10 to 14 people in the last two months, and I"m sure the original folks understand how the dynamics change, along with volume of e-mail. And many of you have told me that you want to keep numbers "as is." And I feel the same way. 14 is a good number.
4. Smack Talk. Although it adds to e-mail counts, I'm all for it. That was one of fun things we did when the group kicked off in Feb. Something to consider--and Carla hinted at it....you might want to get a separate e-mail account for SG stuff. If you do, just let me know and I'll update my master address book and then I"ll put out the official notification e-mail.
5. Sheesh's Call to Arms for Women against Men in "Motion" Theme Contest. It's funny. In Feb, the girls were cackling up a storm about whipping us guys in Valentine show-down. And us guys did a pretty dang good job, I might say. Then in March when we did sunrise/sunset, not a whisper from the girls cause they knew the ultimate outcome. Now, the cackling has begun again and once again, the guys will step up to the challenge. There's 11 girls and 3 guys in SG, which is about a fair fight.
6. Let's Have Fun. Please continue to support each other's posting and if you have constructive criticisms, please send via personal e-mail.
v/r
Ken Smith
SG Captain

Sunday, March 26, 2006

Shooting Gallery--Important Info!!!! Next Theme etc

1. First of all, let's welcome Carla Metzler and Mary Stebbins. This brings our number to 14, and we are now officially closed as a group, because we want to keep it small and personal. Please add Carla and Mary to your address books:

Mary taittems@gmail.com
Carla cjmetz2@earthlink.net

2. Monthly Theme. The following comes from Sheesh (She-She). If you have any questions, please contact her. And Sheesh, please do a "reply all" if you give any advice that can benefit all of us.

April's theme is MOTION....blurred motion. Not freezing motion. There is a million ways to do this if one gets creative. Some of our group have done this many times before, like for example waterfalls (long exposure) and I would say if they have done that they might want to think out of the box and do something different.(expand their portfolio). But if someone has never done that, it's a great thing to learn how to do. But it can be sports, birds, still life, there is a myriad of things that could be done. I wanted to choose something that gives the freedom to not have to go outside if they so chose to, since our last one was outside. Btw Panning is of course included in case anyone wants to do that for motion.

Sheesh adds:

Sorry I forgot to mention that it has to be in camera motion...in other words no PS motion added. :)
(that is for you guys!)
I know your tricks!


3. February Finalists have been Announced. Kudos to the following SG members on their finalists. If I missed anyone, please please correct me. Linda (3), Tammy (3), Gail, Cathy, Mary, and Sheesh. Please visit their galleries and compliment them on their great photos.

4. Finally, don't forget our web page. Keep this site for future reference, as it's a quick way to jump to each person's gallery: http://members.cox.net/ken-mary-smith/Shooting_Gallery.htm


v/r

Ken

Saturday, March 25, 2006

THE SHOOTING GALLERY INFO

The Shooting Gallery


1.  Members.


Robin Lynn

Jan 27th


Linda Lester

Mar 19th


Nina Powell Shields

Apr 7th


Kate Jackson

Apr 23rd


Ken Smith

May 10th


Mary Stebbins

May 31st


Cathy Barrows

July 9th


Darryl Wilkinson

July 26th


Candice Calhoun

Aug 4th


Gail Vitikacs

Aug 17th


Tammy Scott

Aug 21st


Sheesh Killough

Oct 28th


Carla Metzler

Oct 31st


Dennis Flanagan

Nov 8th


2.  Monthly Theme Dates


          20 March (Monday)        Sunrise / Sunset

          17 April (Monday)           Motion....blurred motion

          15 May (Monday)           Dennis

          19 June (Monday)           Robin

          17 July (Monday)            Darryl

          14 Aug (Monday)            Gail

          18 Sep (Monday)            Candice


For the theme, pick whatever you like.  Just give the ground rules.  And, try not to be too restrictive on the interpretation.  Also, please pick the category within one week of posting for the current month.  For example, Sheesh will let us all know theme by March 27th.


3.  Ground Rules (from previous e-mail)


a.  Each month we'll come up with a different theme to include the exact day for posting.  Just like we did for Valentine's Day.


b.  We can rotate the person who decides the theme.  The theme would have to be fairly specific.  For example, the Valentine's theme was specific—use the little candies, versus the generic BP theme of pink, purple, and white.


c.  For the theme, we don't have to post in the same category.  For example, I may post in Landscapes, Cathy may post in People, etc.  However, there may be a certain theme that we decide to post in the same category.  But that would be the exception.


          e.  I want us to have FUN and to "stretch" ourselves.  There will be some themes where you'll probably think "blahhhh, I don't want to do that."  I hope you still do.


f.  Each group member has unique talents.  Some are great with landscapes, others with portraits, others macros, animals, flowers, etc.  I hope everyone can feel free to contact anyone else and request help.  Or contact the group if he/she has questions. 


          g.  I personally enjoy the light-hearted banter we've had.  To me, that's the mark of a group that's enjoying themselves.  But I realize it adds to the quantity of e-mails you get.  I've seen suggestions for using Instant Messenger. 


          h.  Most importantly, it's not a competition between guys and girls.  Yeah, right.  There's 11 girls and only three guys.   


Ken, from Shooting Gallery Home Page

Shooting Gallery - BuZZ and Flood/Flexify Filters

To answer Mary's question.
 
1.  buZZ filter:
 
Link to PDF file
 
   There are many buZZ programs.  I use Simplifier and that's what the links are too.  I had to purchase mine outright.  I downloaded the free trial version, then used Credit Card and purchased it.  I love buZZ.  One of these days, Darryl Wilkinson may use it.
 
2.  Flood and Flexify.  These are Flaming Pear products
 
   ON this page, you'll see the flood and flexify filters.  Both are great and fun.  You install it and can use them for 30 free trial runs, then can purchase for $20 a piece, I believe.
 
3.  Mystical Lights.  This is from AutoFX
 
  I think it's very powerful, but haven't played with it too much.  I did use it to add in light-house beams and selectively lighten things.  I got a bootleg copy, but could not make a back-up copy and I sent my "original" to another person.  I think other SG members have background on Mystical Lights and can chime in.
 
Ken

Friday, March 03, 2006

Q: that subtle textured effect ?

Winter Storm Approaching

I love your "Winter Storm Approaching" photo. Do you mind if I ask what tools did you used to get that subtle textured effect that looks almost like a painting?
--jackie

Hi Jackie, I appreciate your kind comments. I didn't use any filter on that picture, what I did was actually "paint" over the photo with colors picked from the original photo and saturated just slightly using an overlay brush and an overlay layer.

That is, I set the both the brush and the new layer to overlay and then painted onto the water and clouds etc with a very low opacity fuzzy brush. I used tourquoises, yellows, greens and greys to try to enhance the stormy look. The clouds were not original. There were stormy clouds in the original, but they were dull so I put new clouds in a layer behind the picture and then stretched, rotated and positioned them exactly as I wanted with the opacity of the foreground lowered, returned the opacity of the foreground to full and carefully erased the old clouds for the new before painting them with yellows and greens etc. The new clouds I used were taken about the same time.

The picture was taken in low light so I used I high ISO which also contributes a grainy texture which I ameliorated a little with the raw dialogue in PS. (Color noise reduction or something).

I appreciate your attention and interest. Mary :-)

Wednesday, February 22, 2006

Opinion: In Service of the Poem (Image)

I have an MFA, not in photography, but in poetry. In the MFA poetry program, we were taught that “what really happened” is not the first concern of the poem. The first concern of the poem is poetry, is image, surprise, discovery, beauty and truth. “What really happened,” Richard Hugo says, is the Triggering Town for the poem, the jumping off place for exploration and discovery.

I would like to suggest that in a sense, the same is true of photography. If photography is a fine art, and I believe it is or can be, then we have choices. We can do our best to portray what was there (documentary art), or we can make fine art. If the choice is to make fine art, it can still represent what we saw, but it doesn’t have to represent it as precisely as documentary art.

For example, if it was a dark drab dreary day, we can cheer it up, or make it even darker. We can isolate single flowers from a group or make a group where there was only one. We all know this, of course, using flood filters and buzz to make art from documents. I wanted to bring it up because I have noted some people preserving what was even when what could be might possibly be much better. Truth can be found, I believe, in art even if it differs somewhat from "reality."

Additionally, what is beautiful to the eye in person is not necessarily beautiful to the camera or to the eye of the viewer of the finished photo. The camera sees differently than the eye. It doesn’t edit, for one thing, the way the mind behind the eye behind the camera edits, removing sticks, spots, distracting detail and clutter, for example. And it inserts its own issues of exposure, unintentional camera movement, and so on. So we have to be extra vigilant to capture and reclaim our vision for the photo and not just record what was there. Unless we’re doing documentary photography, which is (can be) an art—a different, overlapping and equally challenging art.

When we SEE (truly see, envision) an image, before we take it, there is some element of magic that catches our eye, something that resonates. The object then is to capture that magic, the resonance and not simply what is there. It is hard for me, very hard, but I try not to let what is there stand in the way of and shadow the magc. Of course, I'm rarely successful at this, but it's my goal.

Tuesday, February 21, 2006

Privilege and Wisdom


I am posting this one also just to show that I can but as the last one was posted at medium size I am now trying the large size.

Here again I did not think this shot was good enough to post on BP. I used poster edge on this and then went to Edit fade poster edge. I did this as I was not happy enough with the focusing.

Again the three girls are privileged and the man watching me is our village elder statesman (the chairman of our Parish Council). He is an alcoholic and totters off down to the pub regularly at 12.00 every day and then again at 6.30 pm. If his back is hurting him too much then he drinks red wine at home. He used to be some kind of big wig for the Post Office but alcohol was his downfall. He has a great sense of humour and a brilliant mind though he refuses to use the computer his daughters have given him. He used to write a very witty article for the local rag but he got banned from that when he likened the steak served in our local restaurant to shoe leather. So now he has started up his own publication called the Messinger. And who reads his scrawl and types it up and turns it into a newspaper and delivers it to 100 homes in the village? Yes, Geoff and I do!!

Privilege


I am posting this just to show that I can post this.

The three girls are members of the pony club as I can tell from their ties which Sammy and Charlotte used to wear when they were members. They are such very privileged members of society to be able to own their own ponies and take part in the great activities of the pony club, especially their summer camps.

I used poster edge and then Edit fade poster edge. I did not think this picture good enough to post on BP because of the largest pony's head being partly blocked by the happy little girl on the Shetland. How on earth she managed to keep up with the hunt on that I cannot imagine. But I am sure she had a good time whatever.

Feel free to make any comments though only about post capture editing. There was so much going on. So many people getting in the way and horses moving around that it was just a question of luck as to the composition.

Thursday, February 16, 2006

Creaing a shape or heart mask in Photoshop


This image is by Jay Valle from his BP gallery.

Here are some instructions on how to create masks based on my trial and error. I don't know if there is an easier way, this works for me and I hope it does for you...

1) Open PS and click on new...any size will do for now.
2) Go to your paint bucket and make the white canvas any color, with the apple I left it white.
3) Now in the tool pallet go to the shapes feature located just below the "T", there at the very bottom you'll find the custom shapes tool.
4) As soon as you click on that you'll see a choice menu above.
5) Drop down that shapes menu and you'll see a bunch of little cool shapes to play with.
6) Click on the heart and the color black in the color box to the right.
7) Bring your curser back to your canvas, click the left mouse bottom as you drag it to create your heart shape. You can adjust its size and position by then clicking the Free Transform Path under the edit menu.
8) Now when that's all done go to the layers menu and click on flatten Image.
9) Now that the image is all one piece, click the eraser tool and get the Magic Eraser Tool.
10) Bring that tool to the canvas and put it into the heart then left click the mouse. BINGO! If all went well then you'll see a transparent heart (shown by checkerboard in heart), and your mask is created.
11) Almost done Mary, stay with me now...Go to the top of the tool pallet and click on the rectangular Marquee Tool.
12) Left click keeping finger on mouse button and glide it over the entire canvas from left upper corner to lower right corner, then release, you'll see the dotted wiggle lines around the entire canvas.
13) Now under the Edit menu click Cut. And close the screen. You'll get asked if you want to save? You can or just say no.
14) Now for the final touch....open any picture in Photoshop.
15) Now in the Edit menu click paste.

Okay, there is your mask over your photo. Note: You can adjust the size of the mask by clicking transform under the Edit menu. When all is positioned and colored the way you want it, don't forget to flatten your images to make it one.
I hope this helps, let me know how you made out.

This tutorial was sent to me by BP member Jay Valle. Here is the link to his BP gallery.

Monday, January 23, 2006

Selective color, blue leaf

Selective color, blue leaf, photo by Mary Stebbins. Click to see larger. Posted by Picasa

Detail, selective color

Detail, selective color, photo by Mary Stebbins. This is rather subtle and didn't show up in the last one because it was so much smaller than the one I'd been working with, so I am posting a detail. I guess some pictures just don't work small.

Click on image to see larger. Posted by Picasa

Another Technique for selective color,

Keith with blue eyes, photo by Mary Stebbins. In the previous post, I used the history brush to return the eyes to their original color. In this one, I made two layers, desaturated the top layer, and then erased the black and white portions of the eyes so the colored ones showed through.

Click on photos to see larger. Posted by Picasa

Hybrow with selective color

Hybrow with selective color, photo by Mary Stebbins. I made this a BW by desaturating it and then used the history brush to return the eyes to the original color.

So the challenge for this week, should you choose to participate (ask me for an invitation) is selective color use. Posted by Picasa

Wednesday, December 07, 2005

LONG: Hamilton Beach House

LONG: Hamilton Beach House, photo by Mary Stebbins. This shot includes a lot of foreground and background. The scenery is part of the shot. Visit IMAGIK to see a similar but closer shot taken on a different day. Both shots are LONG, but the other one is closer. There is a gradation between close, medium and long shots of course.

I hope you will post your examples here. And perhaps submit another lesson. This is a new blog. I hope it gets off the ground. Posted by Picasa